Table of Contents
ToggleThe Steam Deck revolutionized portable gaming, letting you carry your entire library in your hands. But here’s the thing, the real magic happens when you dock it. A solid docking station transforms your handheld into a desktop gaming powerhouse, unlocking higher refresh rates, proper audio output, and the ability to play on a real monitor while charging simultaneously. Whether you’re looking to upgrade your gaming setup or just tired of fumbling with USB-C cables, this guide breaks down everything you need to know about Steam Deck docking stations in 2026.
Key Takeaways
- A Steam Deck docking station transforms your handheld into a desktop gaming powerhouse by enabling higher refresh rates, external displays, and proper power delivery while charging simultaneously.
- Look for a docking station with at least 45W power delivery, stable HDMI 2.0 or DisplayPort output, and multiple USB 3.0 ports to ensure optimal performance and peripheral connectivity.
- The official Valve Steam Deck Docking Station ($89) remains the safest choice for guaranteed compatibility, while budget alternatives like JSAUX ($45–$55) and premium third-party options like OneXfly offer excellent value depending on your gaming needs.
- Proper setup involves confirming the correct monitor input, optimizing display resolution and refresh rate settings, and adjusting the fan curve for quieter operation when docked.
- Most docking issues stem from underpowered power adapters or loose cable connections, so verifying 45W+ actual power delivery and firm cable seating eliminates the majority of compatibility problems.
What Is A Steam Deck Docking Station And Why It Matters
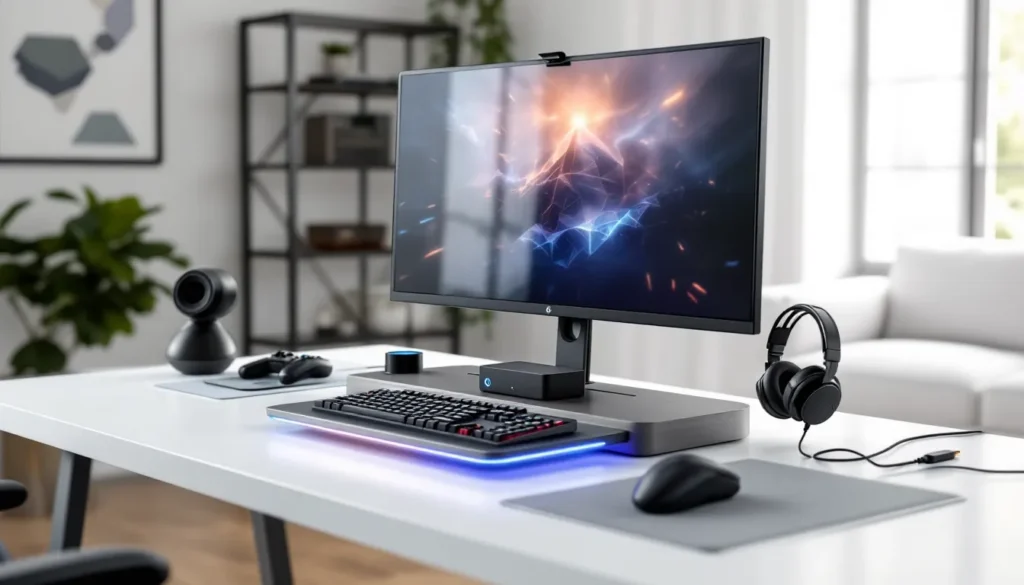
A Steam Deck docking station is a dedicated stand and hub that lets your handheld connect to external displays, keyboards, mice, and other peripherals, basically turning it into a traditional gaming PC. Instead of playing on a 7-inch screen, you’re suddenly running games at 1440p or 4K on a monitor while maintaining full power delivery to keep your battery topped off.
Here’s why this matters: handheld mode is fantastic for portability, but docked mode unlocks the full potential of the Steam Deck’s hardware. You get better thermal management (the internal fan doesn’t have to work as hard), higher sustained performance during long gaming sessions, and the option to play competitively where screen size and responsiveness count. For titles like Counter-Strike 2, Valorant, or fast-paced shooters, that monitor setup is genuinely better than any handheld config.
The docking station handles video output, USB expansion, and power delivery all in one device. Without one, you’re stuck using adapters or dealing with power limitations that throttle performance. A quality dock essentially bridges the gap between your portable gaming device and a full desktop experience, and that’s not a minor convenience.
Official Steam Deck Docking Station vs. Third-Party Alternatives
Official Valve Docking Station Features And Performance
Valve’s official Steam Deck Docking Station is the reference standard. It’s built specifically for the device with Valve’s engineering backing, so compatibility is guaranteed, no driver headaches, no surprise disconnects.
The official dock includes:
- USB-C PD (Power Delivery): 45W output, enough to power the Deck while gaming and charge it simultaneously
- HDMI 2.0 output: Supports up to 1920×1200 at 60Hz, or 1920×1080 at 120Hz depending on your monitor
- 3x USB 3.0 Type-A ports for controllers, headsets, and external storage
- Ethernet port: Lets you wire in for stable online gaming without WiFi interference
- Official build quality: Solid plastic design that feels premium, proper cable management
The downside? It’s $89 (US pricing), and availability can be spotty depending on your region. It’s also fairly bulky if you’re moving it around frequently.
Third-Party Dock Options: Budget And Premium Picks
Third-party manufacturers have flooded the market with alternatives, some genuinely great and others cutting corners that’ll frustrate you mid-game.
Budget tier options ($30–$50) deliver basic functionality: they handle video output and provide USB ports, but power delivery is often inconsistent (15W–30W), meaning your Deck won’t charge while gaming demanding titles. Brands like JSAUX and Anker offer solid budget docks in this range, they work, they’re cheaper, but you’re trading some reliability for cost.
Premium alternatives ($60–$110) compete directly with Valve’s official dock. These typically include:
- 65W or higher USB-C PD for faster charging
- Multiple HDMI/DisplayPort options (some offer dual display support)
- Better thermal design with passive cooling or fan-assisted models
- More USB ports (4–7 total)
- Ethernet connectivity
Brands like iVoler, Spigen, and OneXfly have earned solid reputations here. The trade-off is that third-party docks sometimes have edge-case compatibility issues or require driver updates. It’s rare, but it happens. Also, remote play steam deck functionality may vary depending on the dock’s USB hub implementation, so this is worth checking if you plan to use advanced features.
Key Features To Look For In A Steam Deck Dock
Display Output And Resolution Support
Not all docks are created equal when it comes to video output. Your monitor is only one half of the equation, the dock needs to support the resolution and refresh rate your display can handle.
What to check:
- HDMI 2.0 vs. HDMI 2.1: HDMI 2.0 maxes out at 1920×1200 @ 60Hz or 1920×1080 @ 120Hz. HDMI 2.1 supports higher resolutions and refresh rates (up to 4K @ 120Hz, though the Deck itself doesn’t push that).
- DisplayPort support: Some premium docks include DisplayPort (DP 1.4), which offers more bandwidth and can drive higher refresh rates on compatible monitors.
- Multi-display capability: A few docks let you run two displays simultaneously, which is handy if you’re streaming or want to use a second monitor for chat overlays.
For most gamers, HDMI 2.0 is sufficient and actually matches what the official Valve dock provides. But if you’ve got a high-refresh-rate monitor (144Hz+), a DisplayPort dock gives you more headroom.
Charging Speed And Power Delivery
Power delivery is where many third-party docks stumble. The Steam Deck can draw up to 45W while gaming, and if your dock only provides 30W, you’re charging while playing, meaning net zero battery gain, or even slow drain on power-intensive titles.
The specs matter:
- 45W minimum: This is the sweet spot. It covers the Deck’s peak draw and lets you charge during gameplay.
- 65W or higher: Overkill for the Deck itself, but useful if you’re charging other devices (phone, controller) simultaneously through the dock.
- Check the cable too: Some cheaper docks ship with low-quality USB-C cables that don’t support the advertised wattage. If the cable is proprietary and non-replaceable, that’s a red flag.
Test actual charging speed in-game if possible, theoretical specs don’t always match real-world performance, especially if the dock has passive cooling and gets warm.
Port Connectivity And Expandability
Your dock is a hub, so the number and quality of ports directly impact how much you can connect at once.
Essential ports:
- At least 2 USB 3.0 Type-A ports: One for your controller receiver, one for headset or external drive.
- USB-C (pass-through): Useful if you want to chain another dock or hub, though rare.
- Ethernet: Not essential, but WiFi can introduce input lag in competitive games. Wired is always better for multiplayer.
Nice-to-have:
- SD card reader: Some docks include this, letting you expand storage without an external adapter.
- Audio jack: A dedicated 3.5mm output (plus to HDMI audio) is handy if your monitor lacks speakers.
- Additional USB ports (4+): Good if you’re hooking up multiple peripherals.
Keep in mind that the Deck’s USB hub is limited by its USB 3.1 connection, so chaining too many high-bandwidth devices can create bottlenecks. Prioritize quality over quantity, three solid USB 3.0 ports beat six laggy ones.
Top Steam Deck Docking Stations For 2026
Best Overall Pick For Performance And Reliability
The official Valve Steam Deck Docking Station remains the safest bet. It’s engineered by the company that built the Deck, so you’re guaranteed compatibility with every firmware update and every quirk of the hardware. The 45W power delivery, HDMI 2.0 output, three USB 3.0 ports, and gigabit Ethernet make it a complete solution.
Pros: Perfect compatibility, excellent build quality, future-proof.
Cons: $89 price point, bulky design, slower 60Hz HDMI standard.
If the official dock is out of stock or you want something with better specs, the OneXfly Docking Station ($79–$89) deserves serious consideration. It offers 65W power delivery, DisplayPort support (enabling higher refresh rates on compatible displays), and a more compact design. Users report excellent reliability, and it’s become the go-to third-party alternative in 2026.
Best Budget-Friendly Option
The JSAUX Docking Station ($45–$55) is the budget sweet spot. It delivers 45W power delivery (matching the official dock), includes three USB 3.0 ports and Ethernet, and maintains solid build quality even though the lower price. The main compromise is HDMI 2.0 (no DisplayPort upgrade), but for 1080p and 1440p gaming, it’s more than adequate.
Pros: Affordable, reliable, includes Ethernet.
Cons: No premium features like dual display support, HDMI 2.0 only.
This is the dock to grab if you’re docking occasionally and don’t want to drop $89 on the official option. It’s been a workhorse for budget-conscious gamers throughout 2025 and 2026.
Best For Portability And On-The-Go Use
Here’s the thing: if you want true portability, a full docking station defeats the purpose. But if you’re switching between a desk at home and a desk at a friend’s place, the Spigen USB-C Hub Dock ($35–$45) is tiny enough to fit in a backpack while still providing 45W charging, HDMI output, and two USB 3.0 ports.
It’s not a traditional dock, more like a premium USB-C hub with built-in kickstand compatibility, but that’s the point. You get docking functionality without the bulk. For travelers or LAN tournament attendees, this is genuinely useful. That said, external docks like the modded steam deck setups some gamers run demand a more robust solution, so this option is best for casual docking scenarios.
How To Set Up And Optimize Your Steam Deck Dock
Initial Setup And Driver Installation
Good news: the Steam Deck handles most docking automatically. Plug it in, and within a few seconds, it detects the external display and switches output. No driver installation needed for official or most third-party docks, the Linux kernel includes native USB hub and HDMI support.
Setup checklist:
- Connect the dock to power (separate AC adapter).
- Connect your monitor to the HDMI/DisplayPort output.
- Slide the Steam Deck into the dock, it should click into place.
- The Deck will recognize the external display in ~5 seconds.
- Go to Settings > Display > Display Resolution and confirm the right resolution is selected.
If you’re using a third-party dock and run into connection issues, check:
- USB hub firmware: Some docks have proprietary firmware that updates via the included software. Windows can’t update these directly, but many manufacturers provide a Linux ISO or instructions for flashing via USB on another PC.
- BIOS/firmware date: Make sure your dock’s firmware is current. Manufacturer websites often list updates for compatibility with new Deck OS versions.
- Cable connections: Reseat all USB and power cables firmly. Loose connections are the #1 cause of docking issues.
Display Settings And Game Performance Tweaks
Once docked, the Deck should automatically scale to your monitor’s native resolution. But there are settings worth tweaking for optimal performance.
In Steam Deck Settings:
- Display > Refresh Rate: Set to the highest value your monitor supports. If you have a 144Hz display and want to push the Deck to its limits, set it to 144Hz here. (Note: demanding games won’t sustain 144 FPS, but less demanding titles can.)
- Display > Integer Scaling: Turn this on if you’re gaming at non-native resolutions. It cleans up the image compared to regular scaling.
- Thermal > Fan Curve: Docked, your Deck has better thermals, so you can adjust the fan curve for quieter operation. Go to Settings > System > Power > Fan Curve and set it to a lower threshold.
In-game optimizations:
- Higher resolution is feasible docked. If a game runs at 1080p/60 handheld, try 1440p/60 or 1080p/120 when docked, the extra cooling headroom helps.
- Check ProtonDB or the game’s Verified status on Steam. Some games have known performance differences between handheld and docked modes.
- Disable V-Sync if you’re chasing framerates (though this introduces tearing). With a 144Hz monitor, uncapped frames can look smooth depending on the game.
Most importantly, the complete guide to steam deck specs explains the hardware’s baseline performance. Docking doesn’t change the CPU/GPU, but better power delivery and cooling unlock sustained performance closer to the Deck’s maximum potential.
Common Issues And Troubleshooting Tips
Connection Problems And Compatibility Fixes
The dock won’t recognize the Deck:
- First, try a different USB-C cable. Even slight damage to the Deck’s USB-C port can cause intermittent connection loss.
- Restart the Deck while docked. Hold the power button for 10 seconds, then release.
- If it’s a third-party dock, check the manufacturer’s website for known issues with the current Deck OS version. There’s a chance a recent update broke compatibility.
- Test with a different monitor or TV to rule out a display compatibility issue.
Intermittent disconnects during gameplay:
- This almost always points to power delivery issues. If the dock’s power adapter is underpowered, the Deck will lose USB connectivity when power demand spikes.
- Try moving the dock away from other electronic devices that might cause interference (microwaves, wireless routers).
- Check if the dock is getting hot. Excessive heat can trigger thermal throttling of the USB hub. Ensure airflow around the dock.
The Deck charges slowly or won’t charge while docked:
- Test the dock’s power cable with a multimeter or USB-C meter to confirm it’s actually delivering stated wattage. Many cheap docks advertise 45W but only deliver 15W.
- Try a different USB-C cable, sometimes the dock comes with a subpar cable that can’t handle full power delivery.
- Disable USB power saving features in the Deck’s BIOS. Go to Settings > System > Developer > USB Power Saving and toggle it off.
Audio And Video Output Troubleshooting
No picture on monitor:
- Make sure the monitor is set to the correct input (HDMI 1, HDMI 2, DisplayPort, etc.). This is the #1 missed step.
- If the Deck is docked but the screen is blank, go to Settings > Display > Resolution and try a different resolution. Sometimes HDMI negotiation fails at the native resolution.
- Check whether your dock supports the monitor’s resolution. Older docks with HDMI 1.4 can’t handle 4K or high refresh rates.
Audio crackling or missing from HDMI:
- Go to Settings > Display > Audio > HDMI Output and cycle through the audio format options. Try PCM instead of Dolby or DTS.
- If you’re using a DisplayPort dock, try switching the audio output back to HDMI or to a USB audio device.
- Reduce the volume to 75–80%. Sometimes clipping at max volume causes distortion that sounds like a driver issue.
Stuttering or frame drops only when docked:
- First, confirm it’s not a game issue by testing multiple titles.
- This can happen if the dock is drawing power from the same USB hub as your monitor or other devices, creating bandwidth contention. Move high-bandwidth devices (external drives, capture cards) to a separate USB hub.
- Ensure the dock’s firmware is up-to-date. Outdated USB hub firmware can cause stuttering.
For deeper technical troubleshooting, the steam deck decky loader community is incredibly active with dock-related issues. Even if you’re not using plugins, the support channels often have solutions for specific dock models and firmware combinations.
Docking Station Accessories That Enhance Your Experience
A quality dock is just the foundation. A few complementary accessories can transform your docked setup.
USB controllers and input devices:
Docked gaming demands a proper controller. The Steam Deck’s built-in controls are great handheld, but on a monitor 3 feet away, you want real analog sticks and proper ergonomics. A wired Xbox controller or PlayStation 5 controller (via USB adapter) plugs directly into the dock’s USB ports. No latency, no battery drain. If you want wireless, make sure your dock has enough USB bandwidth for a receiver (most do).
External SSD for storage expansion:
Instead of swapping microSD cards, plug an external USB 3.0 SSD into the dock. This is where the maximize your game library upgrades really shine. Fast external storage lets you install more games and load them faster than internal storage. USB 3.0 SSDs are bottleneck-free on the Deck’s USB 3.1 connection.
Headset or USB audio adapter:
If your monitor lacks built-in speakers, a USB headset or DAC (Digital-to-Analog Converter) via USB provides better audio than HDMI passthrough. Competitive gamers especially benefit, low-latency USB audio is superior for sound cues in fast-paced games. Plug it into one of the dock’s USB ports, set it as default in the Deck’s audio settings, and you’re good.
Ethernet for stable online play:
The dock includes Ethernet, but you need a good cable. Grab a Cat6 or Cat6a cable long enough to reach your router. For competitive gaming in titles where ping matters, wired is non-negotiable. WiFi can introduce 10–20ms of latency variability, in Counter-Strike or Valorant, that’s the difference between a headshot and a miss.
Dock stand or mounting solution:
Some docks aren’t particularly stable on their own. A secondary stand or VESA mount (if your dock supports it) keeps everything upright during intense gaming sessions. Accidental dock bumps are never fun.
Cable extensions and splitters:
If your desk setup is cramped, high-quality USB extensions and HDMI repeaters can route cables neatly without introducing signal loss. Grab powered USB hubs (not unpowered splitters) if you’re chaining multiple devices. According to PCMag, quality cable management can prevent 90% of intermittent connection issues, and it’s worth the investment if you’re a frequent docking user. Also, TechRadar regularly reviews gaming accessory bundles that pair well with Steam Deck setups for comprehensive docking solutions.
Conclusion
A Steam Deck docking station transforms your handheld from a portable gaming device into a legitimate desktop gaming rig. Whether you go with Valve’s official dock for ultimate peace of mind, a premium third-party alternative for extra features, or a budget option if you’re casual about docking, the key is matching the dock to your specific use case.
The fundamentals are simple: you need 45W+ power delivery, stable HDMI or DisplayPort output, and enough USB ports for your controller and other devices. Beyond that, it’s about your budget and how often you’ll be docked. Most issues stem from underpowered docks or loose cables, solid equipment eliminates 95% of headaches.
Once you’re docked and optimized, you’ll understand why so many gamers treat their docking setup as seriously as their main gaming PC. It’s not just about playing on a bigger screen: it’s about unlocking the Deck’s full potential. The experience is genuinely different, and for competitive or extended gaming sessions, it’s worth the investment. Test one out if you’re unsure, chances are you’ll wonder how you played without one.
undefined
undefined