Table of Contents
ToggleThe Steam Deck revolutionized portable gaming when it hit the market, but the default plastic shell? It’s functional, sure, but it’s also bland. Whether you’re looking to add personality to your device, protect it from the wear and tear of constant travel, or simply want a more comfortable grip during those marathon gaming sessions, a new Steam Deck shell might be exactly what you need. The aftermarket has exploded with options ranging from crystal-clear designs that show off the hardware underneath to metallic finishes that look downright premium. This guide walks you through everything you need to know about Steam Deck shells, what they are, why you’d want to replace yours, what types exist, and how to pick the right one for your needs.
Key Takeaways
- A Steam Deck shell replacement is a cosmetic mod that enhances aesthetics, protection, and comfort without voiding your warranty or requiring internal modifications.
- Third-party Steam Deck shells offer diverse options ranging from $30–$60, including transparent designs, metallic finishes, and gradient colors that appeal to different preferences.
- Compatibility is critical when selecting a shell—always verify your specific Deck model and read reviews confirming proper button and trigger responsiveness before purchasing.
- Installation takes 15–45 minutes and requires only basic tools; carefully reseating button strips, triggers, and ribbon cables ensures proper functionality after reassembly.
- Clear and transparent shells showcase internal hardware beautifully but require regular cleaning and matte finishes are preferable to reduce visible fingerprints and smudges.
What Are Steam Deck Shells?
A Steam Deck shell is the external plastic casing that wraps around your device’s internals. Think of it like a case, except it’s not something you slip your Deck into, it’s literally what your Deck is. The shell houses the screen, buttons, triggers, analog sticks, speakers, and all the guts that make the thing work. When people talk about replacing their Steam Deck shell, they’re talking about swapping out this entire outer layer for a different design, color, or material.
Valve does sell official replacement shells in their standard color, but the real fun happens in the third-party market. Manufacturers have created shells in every color imaginable, with special finishes, modified button layouts, and premium materials. Some even feature transparent designs so you can see all the circuitry inside, very satisfying for the hardware-curious crowd.
Replacing a shell is a legitimate mod that doesn’t void your warranty in the way opening up the device for internal upgrades might. You’re swapping cosmetic and protective layers, not touching the core internals. That said, it does require careful disassembly, so it’s not quite as simple as slapping on a case.
Why Replace Your Steam Deck Shell?
There are solid reasons beyond just “I want it to look cool” (though that’s totally valid). Let’s break down the main motivations.
Aesthetic Customization
This is the obvious one. The stock Deck comes in white, gray, or black depending on your model and region. If you’ve had yours for a while or just want something that feels uniquely yours, a new shell transforms the device immediately. Clear shells are wildly popular because they let you appreciate the engineering inside. Metallic finishes give the Deck a premium feel. Limited edition designs from third-party makers can feature artwork, gradient effects, or themed colorways that speak to specific games or aesthetics. Some gamers even commission custom shells with personalized artwork. It’s a cheap way to make your Deck feel like your Deck.
Enhanced Protection & Durability
The stock shell takes a beating in a backpack, stuffed in a travel bag, or just living on your coffee table next to keys and phone chargers. Replacement shells often use more durable plastics or even rubberized materials that resist scratches and scuffs better than the original. Matte finishes hide fingerprints and dust way better than gloss ones. Some third-party manufacturers have beefed up the button mechanisms and trigger construction to withstand heavier use. If you’re the type who takes your Deck everywhere, a tougher shell extends the lifespan of your device and keeps it looking fresh longer.
Improved Ergonomics & Comfort
Here’s where it gets personal. The stock Deck shell works fine, but some gamers find it tiring during long sessions. Your hands are crammed around the edges, and the grip isn’t always ideal. Replacement shells sometimes feature textured grips, contoured edges, or slightly modified button placement that feels better in hand. Some makers have even added shoulder button extensions or grip enhancements inspired by traditional console controllers. The Enhancing Comfort: Exploring Steam reveals just how much impact shell design can have on extended play sessions. A more comfortable grip means less hand fatigue, better control during competitive games, and just a more enjoyable experience overall.
Types Of Steam Deck Shells Available
Not all shells are created equal. Understanding the categories helps you figure out what actually exists in the market.
OEM & Official Replacement Shells
Valve sells official replacement shells directly. These are stock-standard plastic shells in the same design as the original, think of them as spare parts for when your current one gets too scuffed or damaged. They’re not flashy, but they’re guaranteed compatible, officially supported, and as durable as the original design allows. You can grab them from the Valve store, though they occasionally go out of stock. These are the safe choice if you just need a replacement without venturing into the third-party space.
Third-Party Colored Shells
This is where the variety explodes. Companies like Dbrand, jsaux, and others manufacture shells in dozens of colors and finishes. You’ve got your primary colors, pastels, neons, metallics, matte blacks with custom artwork, glossy purples, translucent blues, the list goes on. Many third-party shells maintain the exact same button and trigger layout as the original, making installation straightforward. Some add minor tweaks like improved button responsiveness or grip textures. Prices typically run $30–$60, making them accessible without very costly. These are the go-to choice if you want aesthetics with solid compatibility.
Specialty & Designer Shells
Beyond standard colors, there are limited edition and specialty shells that push the envelope. Clear/transparent shells let you show off the circuit board and internal components, satisfying for tech enthusiasts. Gradient shells blend two or more colors in eye-catching ways. Custom painted or hand-crafted shells from independent artists can run $60–$150+ but offer true one-of-a-kind designs. Some are themed around specific franchises or games (though licensing can be murky here). Premium shells made from textured plastics, soft-touch coatings, or even aluminum accents exist but are rarer. These are for the collector or someone who wants their Deck to be a statement piece.
Key Factors To Consider When Choosing A Shell
Before you buy, think through these criteria to avoid regret.
Compatibility & Fit
This is non-negotiable. The Steam Deck’s design is precise, and a shell that doesn’t fit properly will drive you nuts. The buttons won’t click right, triggers won’t respond, the screen might not sit flush, or the whole thing feels loose. Always check that the shell you’re buying is designed for your specific Deck model and version. The original model, the OLED model released in 2024, and the Steam Deck 2 (if it exists when you’re reading this) all have slightly different dimensions. Reputable third-party makers list exact compatibility on their product pages. Read reviews specifically asking if the fit is tight and buttons respond correctly. Don’t buy from unknown sellers just because the price is lower, a $20 shell that doesn’t fit properly is a waste of money and a headache when you’re trying to install it.
Material Quality & Durability
Plastic isn’t all the same. Cheap, thin plastic cracks easily and yellows over time. Better shells use polycarbonate or reinforced ABS plastic that’s tougher and more scratch-resistant. Check the thickness, thicker shells usually mean better durability. Matte finishes are more forgiving about showing wear than glossy ones. Rubberized or soft-touch coatings feel great but can degrade if they’re low-quality. Premium shells sometimes use hybrid materials (plastic with rubber grips) or even aluminum accents for button covers. Read customer reviews about long-term durability. If people are complaining about cracks after a few months, that’s a red flag.
Button & Trigger Responsiveness
You’re not just buying a pretty shell, you’re relying on it to register every input correctly, especially during tense competitive moments. Stock shells and good third-party options maintain the exact same button mechanism, so responsiveness doesn’t change. But some cheaper alternatives or custom modifications can introduce lag or require harder presses to register. If you’re modifying buttons as part of a shell swap (adding extensions, changing materials), test everything carefully before declaring it done. The last thing you want is a stick drift-like situation where your inputs aren’t registering cleanly during a ranked match.
Price & Value For Money
Shells range from $20 to $200+. Official Valve shells run around $45–$55. Most quality third-party shells sit in the $30–$60 range. Limited editions or artisanal custom builds can go higher. Don’t assume the cheapest option is a good deal, sometimes you’re paying for poor quality. Similarly, the most expensive shell isn’t always the best unless it offers specific features you want (like premium materials or expert craftsmanship). Look at what you’re getting: color, finish, any included accessories (like grip overlays or button upgrades), and warranty. A $40 shell that lasts two years is better value than a $20 shell that degrades in six months.
Popular Steam Deck Shell Options & Features
Here’s a look at what’s actually selling and why people are buying them.
Clear & Transparent Shells
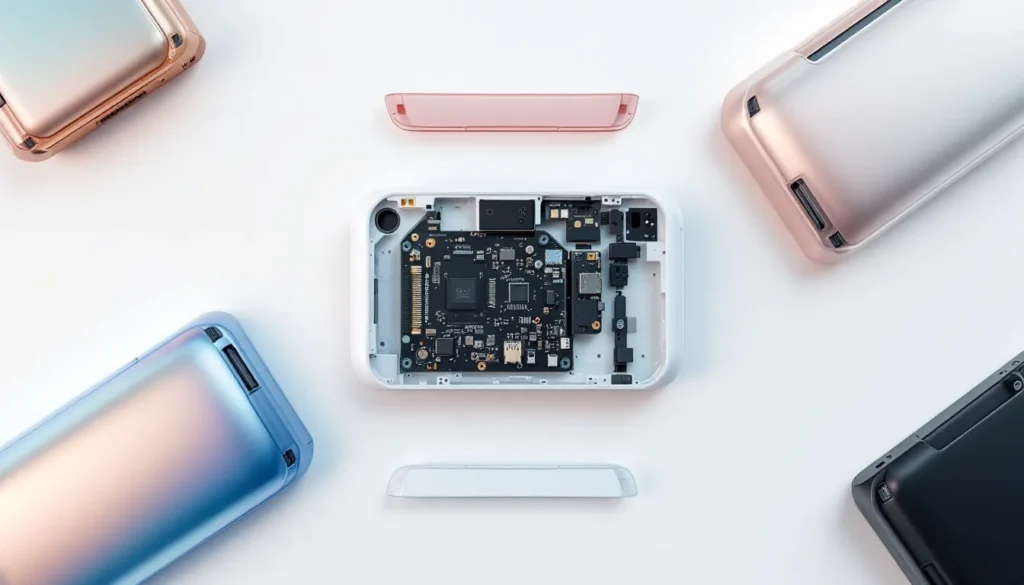
Clear or translucent shells are huge right now. The appeal is obvious: you get to stare at all that beautiful hardware while you play. The circuit boards, the cooling elements, the internals, it’s like visual candy for anyone who loves tech. Clear shells come in a few varieties. Fully transparent shells are completely see-through plastic. Frosted or semi-transparent shells offer a blurred view of the internals, giving a slightly more finished look while still showing off the guts. These shells work best if you keep your Deck clean inside because dust shows up immediately on the inside of a clear shell. They’re also typically priced around the mid-range ($40–$70) since they require different molding techniques than solid colors. Brands like Dbrand and jsaux have solid options here. The downside: they show fingerprints easily on the outside, and they can yellow over time with UV exposure if you leave them in the sun.
Metallic & Gradient Shells
Metallic finishes give the Deck a premium, almost futuristic look. Chrome silver, gunmetal gray, rose gold, and deep copper are popular options. They catch light beautifully and feel more substantial than standard plastic, even if the material is the same. Gradient shells blend two colors smoothly, like a sunset fade from orange to purple or a cool blue-to-cyan transition. These usually cost a bit more ($50–$80) because the manufacturing requires more precision. They’re excellent if you want your Deck to stand out but keep it looking polished and professional rather than loud. The trade-off is that metallic and gradient finishes can show smudges and fingerprints if they’re glossy. Matte versions of these finishes solve that problem but cost extra.
Installation & Maintenance Tips
So you’ve bought a new shell. Now what?
Step-By-Step Installation Guide
-
Power off your Steam Deck completely and let it sit for a few minutes so it’s not warm to the touch. You don’t want to work with a hot device.
-
Gather your tools: You’ll need a small Phillips head screwdriver (usually a #0 or #00 size works best), a plastic pry tool or spudger (a guitar pick works in a pinch), and ideally a clean workspace with good lighting. Avoid carpeted areas where small screws can disappear forever.
-
Remove the back of the old shell: The Deck’s back panel is held on by several screws around the perimeter and near the center. There are also hidden screws under the warranty stickers if you don’t mind voiding that seal (though replacing a shell doesn’t technically void your hardware warranty in most regions). Remove all visible screws and gently pry the back panel up. Don’t force it, there’s a ribbon cable inside connecting the back to the board, so work slowly.
-
Disconnect the ribbon cable: Once the back is off, you’ll see a thin ribbon cable. Gently pull the latch (usually a small clip or tab) to release it. Don’t yank the cable itself.
-
Separate the button strips and triggers: The buttons and triggers are often glued or secured with small plastic clips. Carefully peel or unclip them from the old shell. Keep track of which parts go where, take a photo on your phone if you’re unsure.
-
Transfer components to the new shell: Gently press the button strips and triggers into place on the new shell. This is where fit becomes critical. If they don’t sit flush, the buttons won’t work properly. Take your time here.
-
Reconnect the ribbon cable: Slide the ribbon cable back into its connector on the motherboard and push the latch down to secure it.
-
Screw the back panel back on: Carefully align the new back panel, connect any remaining cables if necessary, and screw everything back in. Go slow and use the right screwdriver size to avoid stripping screws.
-
Power on and test: Turn the Deck back on and test every button, trigger, and stick. Make sure nothing’s sticking and all inputs register cleanly. If something’s off, turn it off and troubleshoot before moving forward.
Installation takes anywhere from 15 minutes for experienced modders to 45 minutes if you’re being extra careful. There are tons of YouTube videos walking through this exact process, consider watching one specific to your shell model before you start.
Cleaning & Care Best Practices
Once you’ve got your new shell installed, keeping it looking fresh is simple. Use a microfiber cloth to wipe down the outside regularly, this prevents dust buildup and keeps fingerprints minimal. If you’re using a clear or transparent shell, clean the inside occasionally by opening the back panel and gently wiping down the visible internals with a dry cloth. Don’t use liquids on the inside. For the outside, a slightly damp (not wet) microfiber cloth is fine for stubborn smudges, but avoid sprays or cleaners that could seep into crevices and damage components.
If your shell gets sticky or gunky from extended use (happens to all of us), warm soapy water and a soft cloth work well. Dry it completely before reinstalling. Avoid extreme heat or direct sunlight for extended periods, plastic can warp or discolor. Store your Deck in a cool, dry place, preferably in a protective case or bag when you’re not gaming. The Modded Steam Deck: Unlock Ultimate Gaming Performance and Customization guide dives deeper into maintaining customized hardware.
Troubleshooting Common Issues
Buttons feel mushy or don’t register reliably: This usually means the button strips aren’t sitting flush in the new shell. Open it back up, reseat the buttons carefully, and make sure there’s no plastic debris or a slight misalignment causing the problem. Test again.
Triggers are too sensitive or not responsive enough: The trigger springs might not be seated correctly in the new shell’s trigger wells. Open it up and check the alignment. Make sure the springs are in the right grooves. If a spring is bent, you might need to replace it.
The back panel doesn’t sit flush or rocks slightly: Usually means you missed a screw or didn’t fully seat the ribbon cable connector. Open it back up, check all screws, and make sure the cable is clicked in properly.
Screen looks misaligned or there are visible gaps: The screen bezel sits on top of the back panel. If your fit is off, the bezel might not align. This goes back to shell compatibility, if the shell dimensions are even slightly wrong, this happens. Try loosening and reseating everything. If it persists, the shell might not be a perfect match for your Deck model.
Plastic is cracking or pieces are breaking: If this happens shortly after installation, the shell is low-quality or you applied too much pressure during reassembly. If it happens after months of use, it’s normal wear and tear, the material quality might just be lower than ideal. Consider switching to a more durable shell brand for your next replacement.
For most issues, patience and methodical troubleshooting work. There’s also a thriving Steam Deck modding community on Reddit and Discord who can help if you’re truly stuck.
Conclusion
A new Steam Deck shell is one of the easiest mods you can do to personalize your device without touching the internals. Whether you’re chasing aesthetics, durability, comfort, or all three, the market in 2026 has options for every budget and preference. The key is understanding what you actually want (just looks? better grip? more protection?), checking compatibility carefully, and choosing a reputable manufacturer. Installation might seem intimidating at first, but it’s genuinely straightforward once you take it step by step.
For gamers looking to go deeper into customization, shells are just the beginning. The Ultimate Guide to Steam Deck Mods: Enhance Your Gaming Experience covers everything from software tweaks to hardware upgrades. And if you’re thinking about expanding storage alongside a new shell, Upgrade Steam Deck Storage: Unlock More Games and Boost Your Gaming Experience pairs perfectly with physical customization.
Your Deck has brought you hundreds of hours of gaming. A fresh shell keeps it protected while making it feel new again. That’s worth the investment.
Recommended Resources & Further Reading
If you’re planning a full customization overhaul, check out what the broader gaming media has to say. Tom’s Hardware regularly covers portable gaming hardware and reviews, offering technical deep dives on durability and materials. For staying on top of gaming trends and accessory releases, PC Gamer has solid coverage of Steam Deck news and third-party accessories. And if you want to see how other portable devices handle customization, Nintendo Life covers similar modding trends for the Switch.
The Steam Deck community itself is incredibly active. Reddit’s r/steamdeck has thousands of photos of custom shells, installation guides, and troubleshooting help. The Steam Deck Decky Loader: opens up software-side customization possibilities that complement a new shell perfectly. Don’t hesitate to ask questions in forums or Discord servers, modders love helping newcomers avoid mistakes they’ve already made.